
Today we are going to deploy the PowerProtect DD Virtual Edition (aka DDVE) on ESXi 6.7 U3, using VMware Workstation 15.5 as the desktop virtualization platform for the nested ESXi host. First I will recommend before starting the setup process verify that you have valid credentials for http://support.dell.com which will be required to download all the necessary components. You can grab and download the DDVE and all the related resources from Dell Technologies Software Downloads. For the nested hypervisor (ESXi) installation procedure please review the following previous post.
After deploying the nested ESXi 6.7 U3 using the OVA file, let’s check the minimum requirements for PowerProtect DD and adjust the nested ESXi settings to provide the necessary resources for the virtual appliance. Under VMware ESXi, the hypervisor minimum requirements are 2 vCPU, 6GB RAM, and 250GB additional storage. For this particular installation, I will configure with 12GB RAM, increase the total number of cores to 4 and finally add a new virtual hard disk of 500GB.

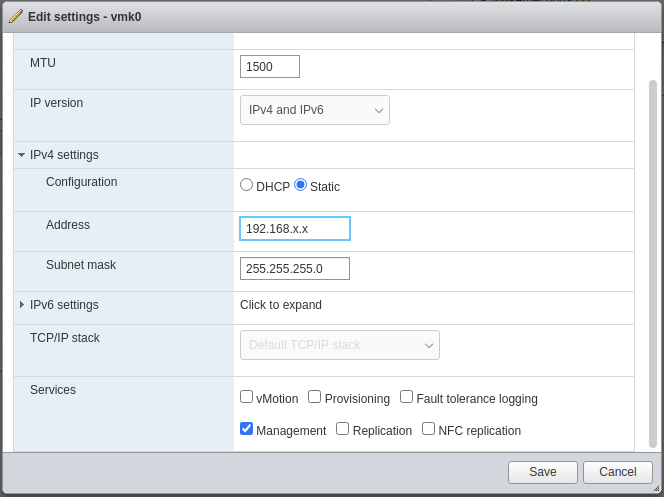
After booting the ESXi I recommend assigning a static IP address for easy access via the web browser using the ESXi web client. You can do this using the ESXi direct console or via your web browser using the dynamically assigned IP address of the ESXi. I will do it via the web browser and then continue with the following required steps to deploy DD Virtual Edition using the ESXi web client.
First using the Navigator select Networking, then the vmk0 adapter, edit the settings and change the IP address from DHCP to Static and provide your IP address.
Next let’s add the additional required datastore capacity using the previously created 500GB hard disk, on the Navigator select Storage and New datastore…
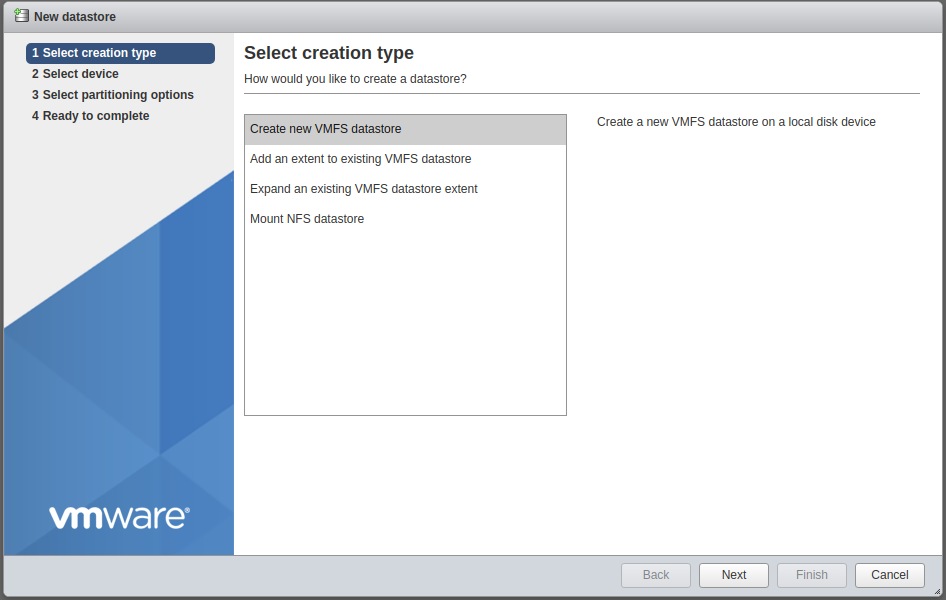
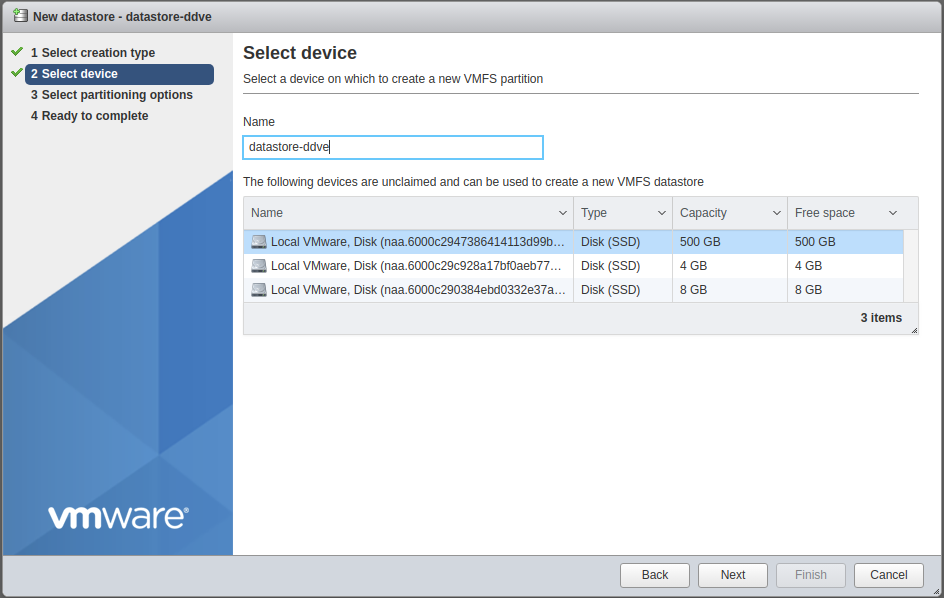
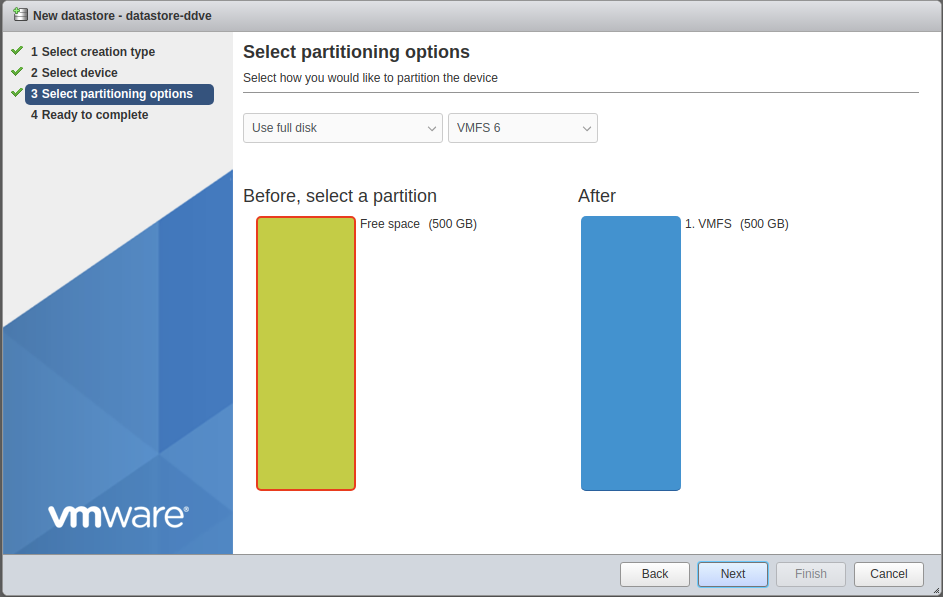
We will use the full partition as a new VMFS datastore.

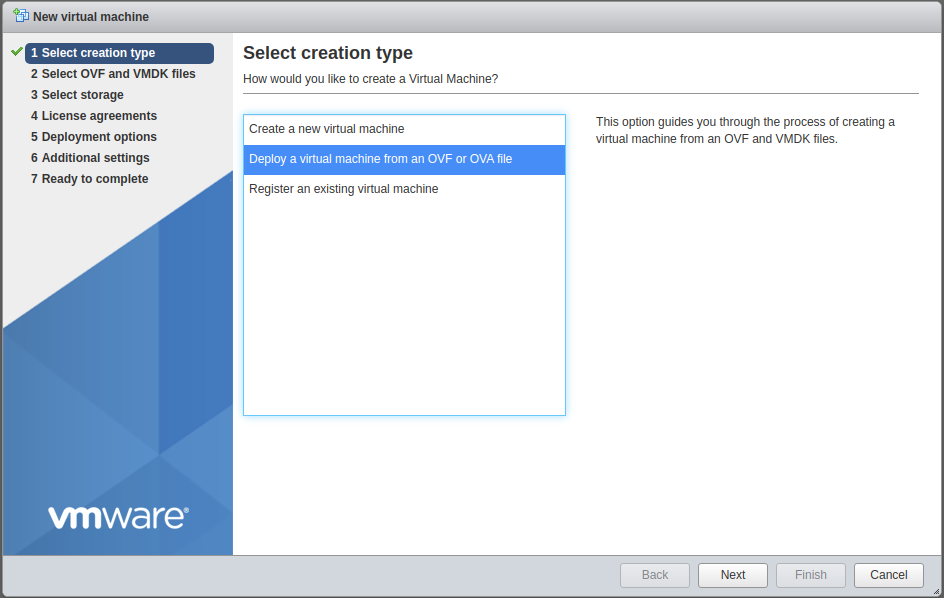
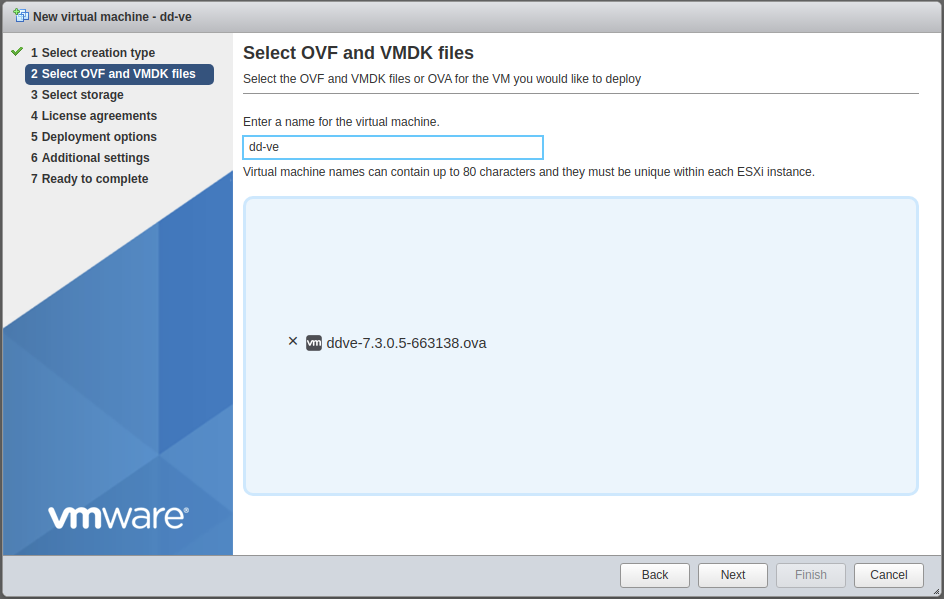
Now let create a new virtual machine using the DDVE OVA file, on the Navigator select Virtual Machines and Create / Register VM…
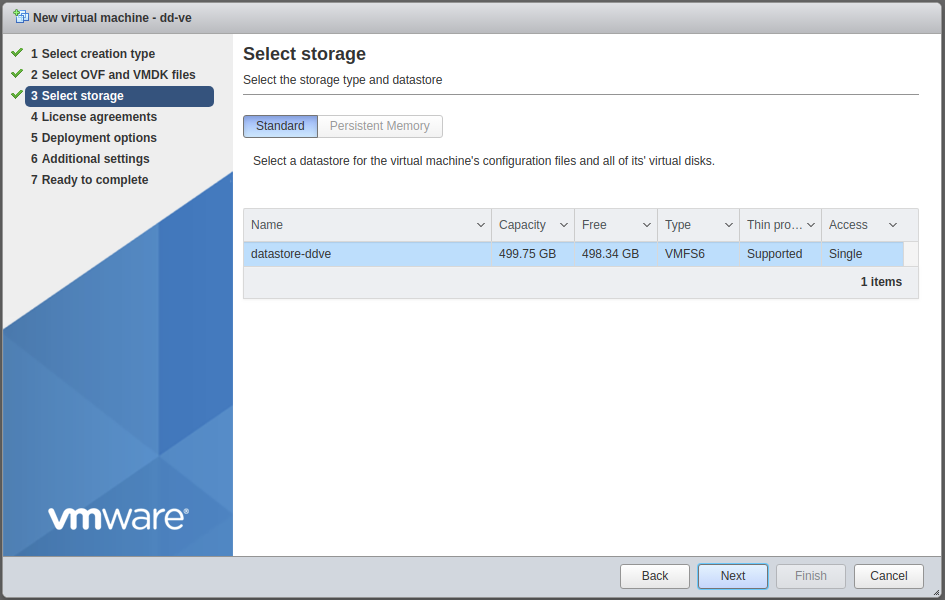
Next, select the datastore, then under Deployment Option choose Deployment Type (8TB Configuration, 2CPUs, 8GB Memory) and unchecked Power on Automatically to configure some additional settings on DDVE VM before boot the virtual appliance. Review and click Finish.


In the next step, we will add a New Hard disk to the DDVE VM that eventually will be used at the Data Domain Active Tier repository. Using the ESXi web client Navigator look for the DDVE VM under Virtual Machines and select Edit, select Add hard disk and choose your capacity under 500GB and click Save. In my example, I added 200GB for the Active Tier repository.

Gentlemen, start your VM now! Just click on the VM to open the browser console, hit any key and you will see the GRUB boot loader, hit Enter again be patient, and wait until the login screen is displayed. Log in with the username sysadmin and with default password changeme, then automatically you will need to enter a new password.

Now let’s proceed to answer some basic configuration questions that we will finish later using the GUI wizard accessing the DD System Manager via your web browser.
Change the IP addresses according to your setup configuration.
Do you want to configure using GUI wizard: [yes]
Configure Network at this time: [yes]
Use DHCP for hostname, domain name, default gateway, and DNS server? [no]
Enter the host name for this system [yourhost.local]
Enter your DNS domain name [local]
Enable Ethernet port ethV0 [yes]
Use DHCP on Ethernet port ethv0 [no]
Enter the IP address for ethV0: 192.168.0.10
Enter the netmask for ethV0: 255.255.255.0
Enable Ethernet port ethV1 [no]
Enter the default gateway IP address: 192.168.0.1
Enter the ipv6 default gateway IP address
Enter the DNS Server list: 192.168.0.1
Do you want to save these settings [Save]
Now to finish this configuration using the DD System Manager please point your web browser to [http://<hostname or IP address>/], log in using the username sysadmin and the new password previously assign and then go to Maintenance > System > Configure System.

In this final step, we will complete some additional configurations using the DD System Manager. First, the GUI Wizard will ask if Do you want to configure the Licenses?, select Yes and then next to proceed. Next, if you want to modify the Network configuration select Yes, I will skip this step for this exercise.

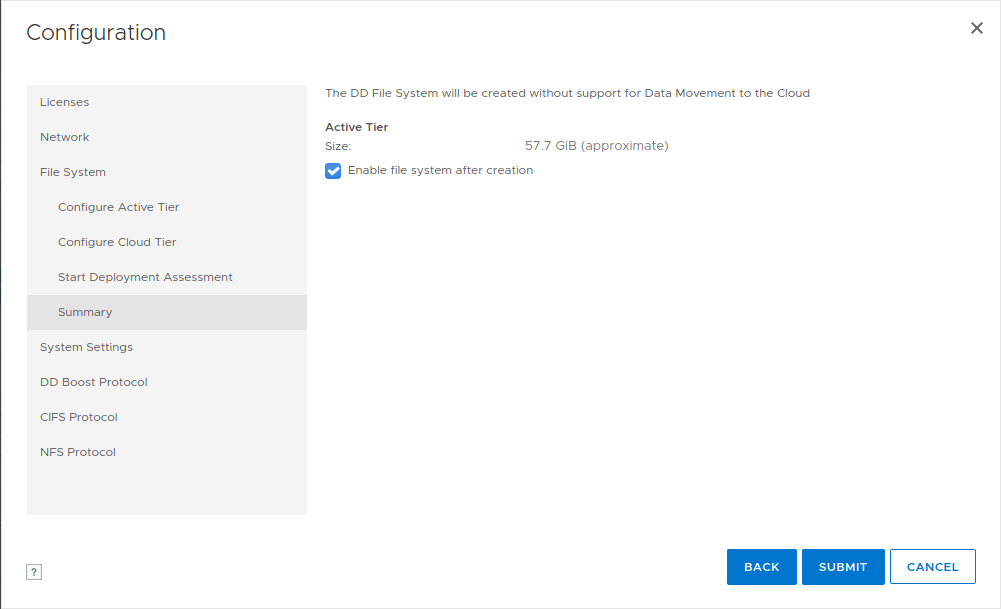
The next step will let us configure and assign storage capacity to the Active Tier, at this point is not necessary to add capacity to the Cloud Tier, this is something that could be done later if required. After hitting next you can confirm the amount of capacity assign to the Active Tier, hit Submit, and wait a little bit until the File System is created and enabled.


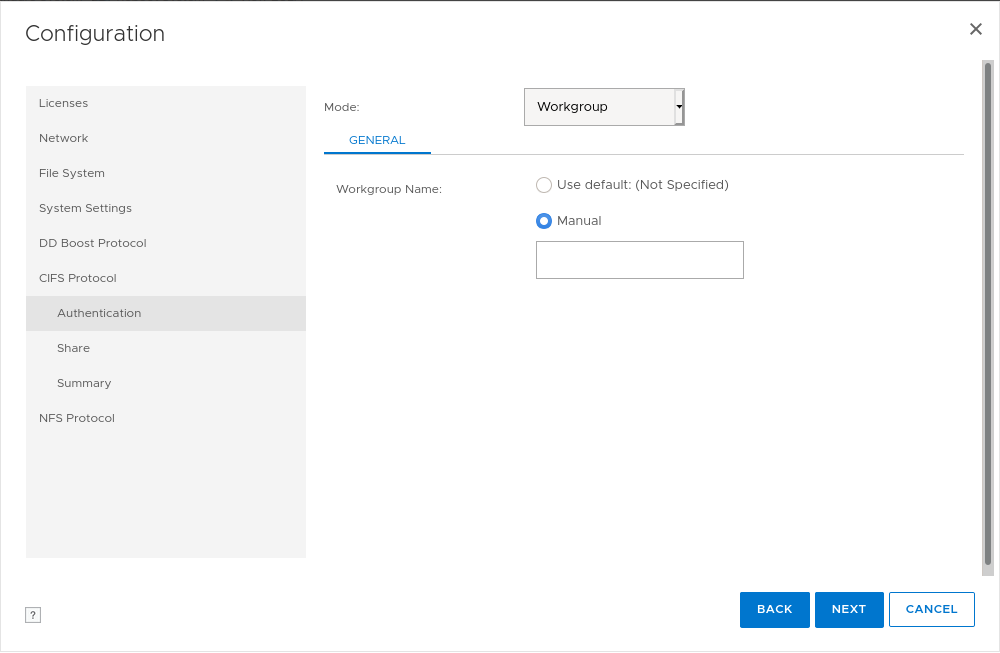
Almost finished, now to use the virtual appliance as a backup repository we need to define the access protocol from the two available options, CIFS and/or NFS. For this exercise, I will choose CIFS, but the NFS protocol is available if you want to configure it. First, select Mode as Workgroup, and under Workgroup Name choose Manual and the name you want to use, hit Next. Moving forward add the Share Name and Directory Path, hit Next, and Submit to finish the configuration of the CIFS access protocol.


Done! Now you should have a fully working Data Domain virtual appliance running on a nested ESXi host under VMware Workstation.

To shut down the appliance gracefully you can do it from the DD System Manager web interface or by typing the following command on the console.
sysadmin@ddve# system poweroff